
 |
| 4th grader |
P.S. 106 4th plus 5th graders learned about health from a nutritionist and
were given fresh produce along with maps to local groceries. My classes observed fruits and vegetables and practiced 3-dimensional shading with pencils, oil pastels, and watercolors. After discussing Roots by Frida Kahlo, students created self-portraits with
a paragraph about their health. They also answered multiple choice questions on nutrition.


.jpg)

P.S. 19
18 Classes
Painting Lessons 1 - 4
Lesson 1 – Painting with Black and White Tempera
Previous Learning – These students have not had art this year, but may have prior experience painting.
Activity – 3rd - 5th graders will paint using black and white tempera.
Objectives – Students will learn how to make different marks using their brushes in several ways. They will become familiar with tempera paint, understand concepts such as, parallel, symmetrical, pattern, representation, abstraction, layering. They will learn to create different shades of grey mixing black and white.
Materials & Resources – Black and white tempera paint, palettes, brushes, 18x12 paper, water in containers, paintings with variety of marks printed in black and white
Discussion & Demonstration - (10 minutes)
Ask students about their experience with paint. Have they used tempera paint? Can they tell you anything about it. Show class an example of a Kandinsky painting and ask them to describe what they see. Can they describe types of lines/brushstrokes?
Describe today’s activity and demonstrate making a painting. Show how to hold brush and clean properly, and asking students to help you create different tones, marks, brushstrokes, layering details on dry paint. Show how water can affect opacity and transparency.
Art Making - (45 minutes)
Students will make their paintings. Encourage them to use variety of tones, lines.

Reflection – (15 minutes)
Do a walk around the cafeteria tables together looking at work, have students share and discuss ask each other about aspects of their work. Could discuss foreground and background if any students have included them.
Lesson 2 – Painting with Color Tempera
Previous Learning - Students previously painted using only black and white.
Activity – Students will color mix and create paintings using color paint.
Objectives – Students will review/build on what they worked on last week. They will understand primary and secondary colors and color mixing.
Materials & Resources – brushes, white, black, blue, yellow, red tempera paint, palettes, 18x12inch paper, water in containers, students’ work from last week, color wheel, Paul Klee artwork
Discussion & Demonstration - (10 minutes)
Ask students to recall what they did last week. Review a student's painting to help. Introduce today’s lesson, painting with color tempera paint. Show students Paul Klee. How does the color effect the painting.
Ask students about their experience color mixing and if they can help you mix primary colors to create secondary colors on palette or directly on paper. Have students help you come with several techniques of mark making.
Art Making - (45 minutes)
Students will create their paintings. Can have students mix secondary colors before letting them start on paper.

Reflection – (15 minutes)
Do a walk around the tables together looking at work. Have students discuss their work such as their color choices and how they made them, what was most difficult for them, how they might do it differently next time.
Do a walk around the tables together looking at work. Have students discuss their work such as their color choices and how they made them, what was most difficult for them, how they might do it differently next time.
Lesson 3 – Landscape Tree Paintings
Previous Learning - Students have now painted and color mixed with tempera paints.
Activity – Students will begin creating paintings of trees in a landscape in color while thinking about what type of weather they want to portray in their painting. They can start by doing quick studies of different weather patterns.
Objectives – Through combinations of lines and shapes students will describe a landscape in paint applied by brush.
Materials: brushes, tempera paint, palettes, 18x12inch paper, water in containers. Divided paper for studies.
Resources: Photos of various species of trees, paintings by Mondrian, Van Gogh
Discussion & Demonstration - (10 minutes)
Ask class to review what they did last class. Have them name some different types of weather. Demonstrate divided paper in 4 sections painting different types of weather. How can brushstrokes and color be used to describe weather?
Have students do quick studies of weather (10 minutes) on their own and then re-group to demo again. Describe and paint a tree and its climate. Add foreground and background, scale, details to try to identify it using a small brush and color to further describe its setting. Leave out examples of trees and tree paintings for students to use as reference.
Art Making - (45 minutes)
Students will begin their landscape tree paintings after their weather studies. Encourage them to use explore brush sizes and color with each quadrant.

Reflection – (15 minutes)
Start next class with reflection by asking about their plans and what they might need to practice.
Start next class with reflection by asking about their plans and what they might need to practice.
Lesson 4 – Finishing Landscape Tree Paintings
Previous Learning - Students began work on their ideas last class.
Activity – Students will finish work on their paintings.
Objectives – Students will understand and make choices about how color can effect and describe their landscape/tree paintings
Materials: paintings from last class, brushes, palettes, tempera paint, water in containers.
Resources: same as last class, student work, a finished painting done beforehand by teacher.
Discussion & Demonstration - (10 minutes)
Start class by sharing student work from last class. Have students recall what they did, how they did it and think about what they are going to do this class. Review foreground and background. Demonstrate again adding details to further describe your tree and its surroundings/climate.
Art Making - (45 minutes)
Students will continue painting their tree landscapes.

 |
| 3rd grader, Trees and Sky |
Reflection – (15 minutes)
Ask students to describe how they used brushstrokes, color, and to title their paintings.
Collage: Lessons 5 - 8
Ask students to describe how they used brushstrokes, color, and to title their paintings.
Collage: Lessons 5 - 8
Lesson 5 – Collage Portraits

Objectives – Students will explore basic collage elements with
multi-colored construction paper, and then will create a finished
collage:
Materials – White 9 x 12 paper, multi construction paper, glue, brushes, scissors
Resources: Matisse
Discussion & Demonstration - (10 minutes)
How can we change paper with scissors or our hands? How can we arrange them on a 2D surface? Look at Matisse. Demo cutting, tearing, edge, placement, overlapping. Demo use of glue. What is something you like to do? Dance, swim, run? Students can place themselves in a setting with background
Art Making - (45 minutes)
Students will change paper in a variety of ways, explore arrangement, they will represent themselves doing something they are good at or like to do.
Students will change paper in a variety of ways, explore arrangement, they will represent themselves doing something they are good at or like to do.
Reflection – (15 minutes)
What did you choose to show? Did you encounter any difficulties creating it and how did you problem solve? What is something you notice in someone else’s collage that solves a similar problem?
Lesson 6 – Collage Portraits Continued
Objectives – Students will explore shiny paper, more complex cutting techniques, and will create a vertical format collage representing another person such a family member or friend.
Materials – Same as previous, plus shiny paper
Resources: Romare Bearden collage portrait.
Discussion & Demonstration - (10 minutes)
What is shiny? Define and demo fringe, folding. Look at resources, discuss how artists represent people they care about. Is there a person who is kind to you, who cares for you, who you would like to make a portrait of? How will you show who they are with specifics, details? How will you use the materials to represent them—do they have gray hair, shiny glasses or jewelry? What will you do first, second, last? Try sequencing large to small pieces.

Art Making - (45 minutes)
Create a vertical format, representational portrait, seen from up close.
Create a vertical format, representational portrait, seen from up close.
Who did you choose in your portrait?
What do viewers know about your friend from looking at your collage?
Lesson 7 – Collage Portraits in a Landscape
Objectives – Students will explore textured papers and will create a horizontal format collage representing themselves in a familiar, outdoor place, utilizing compositional devices to represent 3D space on a 2D surface.
Materials – Same as previous, plus textured papers. Students can choose 12 x 18 white paper as a base
Resources: Bearden, representations of complex outdoor spaces.
Discussion & Demonstration (10 minutes)
Define textures. Look at Bearden and discuss complex spaces where human activity takes place. Is there a familiar outdoor place you like to be? Where is it? What do you like to do there? How would you show yourself there? How can we show what is near, far with different sizes, overlapping?
Art Making - (45 minutes)
Create a horizontal format collage representing themselves in a familiar, outdoor place, utilizing composition to represent 3D space on a 2D surface.

Reflection – (15 minutes)
What did you choose to represent? How can we tell where it is? How did you create the illusion of space in your collage?
What did you choose to represent? How can we tell where it is? How did you create the illusion of space in your collage?
Lesson 8 – Pop-up Collage
Objectives – Students will explore methods of 3D paper construction: fold, slot and tab, dovetail, support, etc. students will create an abstract paper sculpture that is taller than it is wide.
Materials – Single color construction and oak tag paper, scissors, glue, brushes.
Resources: Dr Seuss Happy Birthday To You pop-up book
Discussion & Demonstration - (10 minutes)
Look at pop-up book. Define and demo techniques.
Art Making - (45 minutes)
Students will create an abstract paper sculpture that is taller than it is wide, using one color construction paper, oak tag, and that explores all techniques.

Reflection – (15 minutes)
What is a sculpture? What did you represent? How did you do it?
Objectives – Students will explore methods of 3D paper construction: fold, slot and tab, dovetail, support, etc. students will create an abstract paper sculpture that is taller than it is wide.
Materials – Single color construction and oak tag paper, scissors, glue, brushes.
Resources: Dr Seuss Happy Birthday To You pop-up book
Discussion & Demonstration - (10 minutes)
Look at pop-up book. Define and demo techniques.
Art Making - (45 minutes)
Students will create an abstract paper sculpture that is taller than it is wide, using one color construction paper, oak tag, and that explores all techniques.

What is a sculpture? What did you represent? How did you do it?
Clay Sculpture: Lessons 9 -15
Lesson 9 – Clay Introduction
Previous learning to build on - some students may have experience with clay.
Activity – students will explore and manipulate clay in several ways. They will combine the shapes they make into a sculpture
Objectives – students will understand what clay is and where we find it, how and why people use this material. They will become familiar with clay, learn about slipping and scoring and work with balance when making their sculptures.
Materials: air drying clay, wire cutter, water, tools for slipping and scoring
Resources: Pictures of clay, clay digs, historic ceramic vessels.
Discussion & Demonstration - (10 minutes)
What is clay? Where do you find it? What have people used it for? How long have people used clay? How is it made into an object? Using photographs to demonstrate these features, students will become acquainted with the material.
Demo how to make ten different objects by rolling, flattening, pinching and pulling the clay. The objects will then be combined using the scoring and slipping technique to build a tower. Scoring and slipping will be done with toothbrushes.
Art Making - (45 minutes)
Students will be given a slab of clay and begin making 10 different shapes.

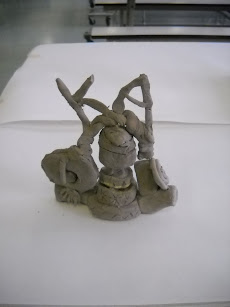 |
| 5th grader |
Reflection – (15 minutes)
Ask students to respond to the activity. What did they learn about clay? What were they able to do with it? What did they make with it? What happens when the clay is left out of the bag for a while? Can you work/manipulate dry clay?
Lesson 10 – Clay Pots
Previous learning to build on - students have all now worked with clay.
Activity – students will follow a series of steps to create pots.
Objectives – Students will learn that; Clay is three-dimensional, has manipulability, is tactile, it has volume weight and density. It will take on any shape and stay that way.
Materials: Clay, wire cutter, water, tools to slip and score, rolling pins
Resources: Look at handmade ceramic vessels, historical and modern.
Discussion & Demonstration - (10 minutes)
Review what they learned/worked on last class.
Demonstrate making the elements of the mug on the table before joining them together to form a vessel. Join wet pieces of clay by scoring and slipping them together with a toothbrush.
Students make a cylinder from a rectangle, put a base on it and form a handle. A kneaded lump of clay is place on the table. The clay is flattened with a rolling pin until it is an +/-1/4-inch thick. The slab and cut into a rectangle with a clay tool. Both hands are cupped and used to gently bend the rectangle into a cylinder. The ends are scored and slipped then pinched together. The balance of the clay is rolled out. The base of the cylinder is scored and slipped, then connected to the cylinder, with the excess cut off. This excess can be used to form a handle by rolling a thick coil of the clay to apply to the side of the cup as a handle.
Art Making - (45 minutes)
Students will make their pots.

Reflection – (15 minutes)
In reflection students will discuss any difficulties they experienced, and how did they solve those problems. They will describe their cups/mugs. How did the mistakes lead to discoveries about the clay and how did the students resolve these.
Lesson 11 - Animal Sculptures

In reflection students will discuss any difficulties they experienced, and how did they solve those problems. They will describe their cups/mugs. How did the mistakes lead to discoveries about the clay and how did the students resolve these.
Lesson 11 - Animal Sculptures

Lesson 12 - Painting Clay Pots and Animals with Tempera Paint

Lessons 13, 14, 15 - Sculpting and Painting Clay Castles
Materials & Resources: more air dry clay, wire, pottery tools, water, heavy duty ziplock bags, Castle by David Macaulay
.jpg) |
| 5th grader |

Lesson 16 - Drawing with Oil Pastels
Previous learning to build on - Castle sculptures and design features
Activity
- Students will draw from observation and memory of architecture in an
open-ended drawing lesson, to design a building.
Objective: Students will understand how to blend and color mix oil pastels.
Materials
& Resources: pencils, oil pastels, 14 x 11 paper, photo printouts
of architecture: Zaha Hadid, Frank Lloyd Wright


Lesson 17 - Pencil/Watercolor Drawings from Observation

Materials & Resources: watercolor sets, 14 x 11 inch paper, Rina Banerjee examples, flowers
 |
| Reflection writing activity |
Lesson 18 - Drawing Flowers from Memory and Printmaking
Materials & Resources: styrofoam scratch plates, ink, brayers, Robert Zakanitch examples


P.S. 254
8 Printmaking Lessons for 3rd - 5th Grade
Lesson 1 – Making Collagraph Plates
Previous learning to build on - Some students may have made collages and self-portraits before, and possibly even collagraphs.
Activity - Students will begin by making rough sketches of themselves on 18x12inch paper to practice proportion and scale. Then again imagining the shapes that make up their bodies they will start cutting out those shapes before glueing them to their base.
Objectives – Students will review creating compositions using collage and how it is different from other mediums (can change around before glueing) students will understand collagraphic printmaking and vocabulary such as texture, overlap, layer, print/printmaking, collagraph, and they will begin to create their collagraph plates. They will make decisions about pose/gesture, and details/clothes.
Materials: 18 x 12 inch oak tag (2 per student, 1 background 1 for cutting) glue, scissors, pencils
Resources: Finished portrait collage/plate
Discussion & Demonstration - (10 minutes)
Ask students about their experience/knowledge of collage and define what a collage is. Explain we will be making self-portraits using collage. Ask class if they can name some of the shapes that make up their bodies. Show students the paper they will be working on, and explain they can choose to work horizontal vs. vertical depending on their pose. Do a rough sketch, showing appropriate scale of figure on paper. Some students will probably have trouble filling the page
Have students do their own sketches and then re-group.
Have students help you begin demo/making a plate. Which part will you start with? Remind/show class to fill entire page and build up texture to make/imagine details. Demonstrate trying different compositions before glueing. Have a finished plate made already to show surface built up and several details, and maybe some imaginative details. Can discuss difference between working from imagination and observation and how we will be using plates to make prints eventually.
Art Making - (45 minutes)
Students will work from imagination and begin cutting out portrait shapes possibly glueing to their base, time permitting.
Reflection – (15 minutes)
Choose some plates to share and ask class if they can identify or guess the person/who the portrait is of? How would it be different if we had made collages from observation? What will you do next time? What was the hardest part? Why is surface needed for plate?
Lesson 2 – Continuing with Self-Portrait Collagraph Plates
Previous learning to build on – students previously began their collagraph portrait plates.
Activity - students will continue cutting out details, glueing them, and building up a surface
Objectives – students will understand why it is important to add details to the plates, and finish adding and glueing them by the end of class.
Materials: plates and cut-out pieces from last class, oak tag, scissors, glue, pencils.
Resources: example of collagraph plate and print made from it.
Discussion & Demonstration - (10 minutes)
Begin by asking class to remind you what they did last time. Show some examples of student portraits plates, particularly some that need more details. Can re-demonstrate cutting out detail and glueing to base/portrait, and how layering can add texture and depth. Ask class why it is important to built up surface? Show students a collagraphic print made from a collagraphic plate. Ask students how the artist made all the details in their print?
Art Making - (45 minutes)
Students will continue and should finish their portraits glueing down all pieces of their plates. Encourage them to add details wherever possible.
Reflection – (15 minutes)
Choose some new students to share or do classroom walk of finished plates. Have students observe and share. Begin discussion of printmaking happening next class.
Lesson 3 – Printing Collagraphs
Previous learning to build on – students have now made collagraphic plates. Some may have printed before in school.
Activity - students will be making prints from their plates by choosing paper, registering their plate, inking the plates and then printing/transferring them onto their paper and placing them into the drying rack.
Objectives – students will understand collagraphic printmaking, new vocabulary such as brayer, they will make decisions about background color and ink color and how to contrast. They will follow a series of instructions and make their prints.
Materials: collagraph plates, ink (4 colors), inking trays, brayers with soft rubber, 18x12 paper, newspaper
Resources: Artist collagraph print
Discussion & Demonstration - (10 minutes)
Ask class to remind what they did last time. Show example of a collagraph plate and a print made from it. Ask class how is the print different from the plate? Have they printed before? Can anyone share how it was made? Tell class we will be making prints today and begin demonstration of printmaking process in two parts: inking and printing. This will be done rotating in pairs at 2 separate stations. Begin by choosing paper and registering plate in the center. Then demonstrate putting ink into tray and rolling brayer to evenly cover in ink. Then spreading ink over plate evenly with brayer in one direction. 2nd part is printing. Demo placing plate over the registered paper and rubbing evenly (also using a clean brayer if available), not moving the plate, and slowly peeling, then placing print on rack to dry. Divide class into pairs and stations.
Art Making - (45 minutes) – students will work in pairs or rotate between inking and printing stations. They will create several prints off their plates. Some students will probably need reminding about the process and how much ink will make a good print.


Reflection – (15 minutes)
Ask students what was the most difficult part? How can you make it easier?
Ask students what was the most difficult part? How can you make it easier?
Lesson 4 – Finish Printing Collagraphs
Previous learning to build on - students have printed from their collagraph plates
Activity - students will continue/finish printing. Can explore combining colors, ghost-printing.
Objectives – students will again follow instructions and make prints. Each student should have 3 self-portrait prints by the end of the class. Can have students sign and title their prints too.
Materials: collagraph plates, ink (4 colors), inking trays, brayers (hopefully soft rubber), lots of 18x12 paper, newspaper
Resources: Artist collagraph print
Discussion & Demonstration - (10 minutes)
Ask class to remind what they previously did and look at dry prints now.
Demo combining colors by inking brayer in one and then lightly once over in another color tray. Can demo ghost-printing by inking plate once and printing a 2nd piece of paper after the initial, time permitting.
Art Making - (45 minutes) students will again work in pairs and rotate between inking and printing stations. They will create prints off their plates. Again some students will probably need help/reminding.
Reflection – (15 minutes)
Ask students to talk about how they made their prints, all the steps they needed to make a collagraph print. Can display dry work around classroom or share a few.

Lesson 5 – Beginning Drawings of Animals for Styrofoam Plate Prints
Previous learning to build on - students have made prints and are now familiar with printmaking process
Activity – students will begin by making drawings from observation of animals on paper before transferring them onto their Styrofoam plates.
Objectives – students will make a drawing from observation and understand how lines will add details, show texture etc. to their animals. They will understand how background and foreground give their subject a sense of space, scale in their picture/environment and contrast to their animal. Vocab: contrast, background/foreground, etch/engrave
Materials: pencils, 12x9 inch paper
Resources: variety of animal photos from National Geographic, Albrecht Durer drawing of Rhinoceros for how an artist added details
Discussion & Demonstration - (10 minutes)
Can begin by asking class what they did last time and explain they will be beginning a new type of printmaking today. Introduce relief printmaking/engraving, what is engraving? Familiar with etch, carve? How is that different from the collagraphic printmaking?
Introduce today’s lesson, a beginning drawing for relief plate, the subject this time is an animal in an environment. Choose an animal with lots of details. Demo carefully studying your animal and drawing it from observation. Discuss working horizontal vs. vertical and proportion and scale. Remind it is again important to make the animal large in order to add smaller details later. Ask class to help describe the animal and show or ask how an artist can display that description. Once the animal is finished explain they can work to add in a background, filling up the entire page.
Art Making - (45 minutes)
Students will choose and draw their animals.

Reflection – (15 minutes)
Have students share some work. How did they show scale or how far away the animal is? Describe what their animal is like.
Have students share some work. How did they show scale or how far away the animal is? Describe what their animal is like.
Lesson 6 – Engraving Styrofoam Plates
Previous learning to build on – students have made collagraph plates and preparatory drawings for styrofoam plates
Activity – students will transfer/engrave their styrofoam plates from their drawings
Objectives – students will learn to transfer and engrave styrofoam plates and understand how their engravings will be used to make prints.
Materials & Resources: animal drawings from last class, styrofoam plates (same size as drawings), different colored pencil or pen for re-tracing lines, masking tape.
Discussion & Demonstration - (10 minutes)
Ask students to recall what they are working on.
Demonstrate taping finished drawing over a styrofoam plate and tracing the outlines of animal and environment. Drawing can be removed and details added again directly to plate. Make sure students can see the etched surface and check to feel the indentation on the plate.
Show class a finished plate and print. Discuss what will happen during the printing process and how the etched areas will receive/transfer the ink.
Art Making - (45 minutes) students will engrave their styrofoam plates, adding details to fill the entire plate. Should make sure they are pressing hard enough and making an impression.

Reflection – Ask students to guess the next step in printmaking process? How will it work, how is it different from the collagraph?
Lesson 7 – Printing
Previous learning to build on – students have printed from collagraph plates
Activity – students will be making prints from their Styrofoam plates by inking the plates and then printing them onto paper.
Objectives – students will follow a series of instructions, review and understand how to make a print.
Materials & Resources: engraved plates, 14x11 inch paper (slightly large than plates), brayers, ink, ink trays, newspaper
Discussion & Demonstration - (10 minutes)
Ask class to recall how the collagraph prints were made.
Demonstrate inking brayer in tray evenly, and inking plate evenly. Demo making a print from an inked plate. Discuss over and under inking plate, what effect with that have on the print. Divide class between stations.
Art Making - (45 minutes)
Students will rotate between inking and printing stations. They will create 3 prints off their plates, placing them in the drying rack. Some students will probably need help/reminding with the steps.

Reflection – Ask students what was the most difficult part? What would you do differently next class? How is the print different from the drawing?
Lesson 8 – Finish Printing
Previous learning to build on – students printed last class
Activity - students will finish printing from their plates by inking the plates and then printing them onto paper. This time can try different color paper, mixing colored ink if they have all made 3 prints.
Objectives - students will follow a series of instructions, review and understand how to make a print.
Materials & Resources: engraved plates, paper, brayers, ink, ink trays, newspaper
Discussion & Demonstration - (10 minutes)
Can begin class by looking at some of the dry prints from last class. Why do you think some of the artist's lines are clear and others are not? How does the pressure you use when rubbing the back of your print make a difference?
Art Making - (45 minutes)
Students will rotate between inking and printing stations. They will all create at least 3 prints off their plates, choosing different color paper and ink, and place in the rack to dry. Some students will probably need help/reminding again.

Reflection – Compare prints from last class to this class. Review steps taken to create them.
Have students write out steps with illustrations

Have students write out steps with illustrations

4 Collage/Pop-up Book Lessons with 1st and 2nd Graders at P.S.254
Lesson 1 - Collage Exploration Using Scissors
Lesson 1 - Collage Exploration Using Scissors

Lessons 2,3,4 - Creating painted paper & collage pop-up books


P.S. 112
6 Woodblock Sculpture Lessons for 2nd Grade
Lesson 1 – Woodblock Stacking
Previous learning to build on – PS112 students previously made clay pot sculptures and animals. Probably have some prior experience with wood in block centers.
Activity – students will 1st practice balancing wood without gluing together pieces. Working large to small and with concepts of above, over, inside, outside, vertical, and horizontal.
Objectives – students will create and understand a 3-dimensional work of art/sculpture. They will practice stacking and balancing their wood pieces. They will compare pieces of different shapes and sizes as they create their sculptures.
Materials: cardboard bases and assorted wood block pieces. (For this class of roughly 20 students I ordered 1- 25 LBS Box Filled with Assorted Wood Pieces from Casey's Wood and 7 -Wood Whacking Sacks – 2-1/2 lbs. from Nasco. Many students made two sculptures and there was some left over wood at the end.
Resources: Louise Nevelson, David Smith
Discussion & Demonstration - (10 minutes)
Ask students about wood. Where does it come from? How does it help us? Can students find any wood objects in the room? Discuss/show wood characteristics such as smooth, rough, strong, breakable.
Describe today’s activity.
Explain and demonstrate how wood can be used to create sculpture. Show balancing wood with weight different shapes and sizes of wood, symmetrical or asymmetrical, building up and out. Find out what happens when something heavy is put on something light. Look at sculptures by Louise Nevelson. Discuss her background, how she stacked, balanced, pieces of found wood to create her sculptures.
Art Making - (45 minutes)
Students will experiment stacking and building their sculptures.
Reflection – (15 minutes)
Choose volunteers to share. Let them describe their work if they want. Ask entire class if they have questions, such as did the artist have something in mind when they built this? Describe how they built it, how many shapes can they name?
Lesson 2 - Gluing Wood Sculptures to Cardboard Bases
Previous learning to build on – students previously stacked, balanced, experimented with different shapes and arranged their wood blocks in different ways.
Activity – students will build and glue there wood block sculptures together and onto their base.
Objectives – students will follow directions, the will understand how to glue their pieces together appropriately. They will build up their sculptures and add details with smaller pieces.
Materials: wood blocks, cardboard bases, glue for wood
Resources: same as last class
Discussion & Demonstration - (10 minutes)
Ask students to recall what they have previously done last class. Describe today’s lesson building and gluing sculptures together. Demonstrate an appropriate amount of glue and how long it takes to set while holding and counting. Describe what can happen with too little or too much glue. Ask students to tell you about balance.
Art Making - (45 minutes)
Students will build and glue their sculptures onto their base. if not using glue specifically for wood, students can use tape to help hold wood in place while it dries.

Reflection – (15 minutes)
Have students come with up a title or name for their sculptures. Discuss and display. Ask questions about balance and scale. How big would you have to be to fit into that space? Can have students reflect in pairs, explaining their titles/works to one another and then sharing. Ask them what was most difficult for them and how they might do it differently next time.
Have students come with up a title or name for their sculptures. Discuss and display. Ask questions about balance and scale. How big would you have to be to fit into that space? Can have students reflect in pairs, explaining their titles/works to one another and then sharing. Ask them what was most difficult for them and how they might do it differently next time.
Lesson 3 – Painting with Tempera Paint
Previous Learning to build on – PS112 students have experience painting and color mixing with primary colors in 1st grade.
Activity – students will paint on paper with tempera, discovering/reviewing the medium and explore making different types of lines with their brush
Objectives – students will review how to paint with tempera paint and color mix. They will discover and get more comfortable with the medium and brushes, before painting their sculptures.
Materials: yellow, green, blue, white, black tempera paint, different brushes, water, sponges or paper towel, paper
Resources: lines, patterns, shapes, printouts or found/observed in or around the classroom.
Discussion & Demonstration - (10 minutes)
Introduce today’s lesson on painting with tempera paint. Discuss different types of lines: What kinds of lines can you find in this room? Invite the children to do an imaginary painting exercise exploring lines and body movements. Have them move their hands and bodies to make wavy, zig-zag, curvy and straight lines. Introduce the paintbrush. Explain the different parts and show how to use it and how to take care of it (and clean it properly after painting) Demonstrate painting different kinds of lines on paper. Show children how they can make their brushes “dance” on the paper (ex. twirling, dabbing, and spreading). Ask: What would a hop, skip, twirl, dab, run, walk, wiggle, giant step look like with a paint brush?
Have all new art vocabulary on Word Wall.
Demonstrate color mixing and painting with primary/secondary color wheel on display in room. Have students help choose, explain how make colors.
Art Making – (45 minutes)
Encourage students to paint as many lines, patterns, colors and to add details once paint has dried.

Reflection - Ask questions such as: I notice that you made a new color, what is the name of this color, What did you do to make it? What shapes and lines did you make in your painting? Which brushes did you paint with? Did you make this painting quickly or slowly? Ask about the different shades of orange: What would you name this color?
Lesson 4 – Painting Sculptures
Previous learning to build on – PS112 students have color mixed with primary colors.
Activity – students will paint their wood sculptures mixing primary colors directly onto their sculptures.
Objectives – students will review and practice how to use a brush properly as well as how to create different colors and how color can effect their artwork.
Materials: woodblock sculptures, brushes, blue, red and yellow acrylic paint, trays for paint, water, sponges or paper towel for drying brush.
Resources: a completed sculpture ready to paint
Discussion & Demonstration (10 minutes)
Ask students to recall what they worked on last class. Present an example sculpture and describe today’s activity. Demonstrate using a paint brush appropriately again, using the tip, and paint sculpture. Show and review, asking class questions about color mixing, and paint secondary colors on sculpture. Also show painting patterns, details and remind students to let paint dry before adding on top of. Remind and demonstrate with students, brush must be cleaned and dried before changing color.
Art Making - (45 minutes)
Students will paint their sculptures.

Reflection – (15 minutes)
Select a few students to talk about their painted sculptures. Ask them about their choices and how they made their colors. Ask class if they have questions for the artist about contrast, effect of color.
Lesson 5 – Drawing from Observation of Sculptures/Collaging
Previous learning to build on – PS112 students have sketched from observation for collagraphs of NYC buildings and made collages in 1st grade.
Activity – students will observe the shapes they see in their sculptures. Sculptures can be rotated and exchanged with other members of their tables, or groups from tables can rotate. This can also be done as a pop-up collage.
Objectives – Students will create a collage of an existent object by examining it. Students will render their observations by sketching them out first or directly cutting into their paper. They will understand that an artist can make decisions about scale or spatial relationships and proportions that exist in their sculptures. Also that collages can be changed as they go along before being glued.
Materials: finished sculptures, various kinds paper, pencils with erasers, scissors
Resources: Miro paintings and collages
Discussion & Demonstration (10 minutes)
Ask class to recall what they have previously done and describe today’s lesson. Show and tell the class about the artist Joan Miro. Ask class if they can identify, figures, objects in Miro’s work. Discuss how the artist made things he saw? Not necessarily like the figures or objects he was looking at.
Demonstrate using a sculpture selecting shapes you see and drawing them on paper or directly cutting them out. Show class how perspective can change the shapes you see such as looking straight on or from a bird’s eye perspective. Draw shapes small or large. Select and outline multiple shapes. Remind students they do not need to create exact copies of their sculptures, they can simply use them as a guide for creating interesting shapes.
Art Making - (45 minutes)
Students will examine their sculptures and begin to make their collages. They will explore using many different kinds of paper. They can also rotate and look at different sculptures.
Reflection – (15 minutes)
Ask students to share their work and what shapes they observed. Ask other students if they can see or match the drawings or shapes to the sculptures.
Lesson 6 - Collage with Partner
Previous learning to build on – most students will likely have done collage in 1st grade
Activity – students will continue working on their collages. They can work in pairs on larger paper if they have finished their own collage.
Objectives –students will review collage and how it is different from other mediums, they will focus on a multi-step task and think about what types of paper they want to use. Students will practice cooperating and understand collage as a useful way to try out different compositions.
Materials: pencils, scissors, drawings from observation, different assorted types of colored, textured paper, newspaper, glue, large base paper (multi-colors)
Resources: Miro paintings and photo collages he based them on, a completed collage.
Discussion & Demonstration (10 minutes)
Ask class to recall what they had previously done. Describe today’s lesson Ask class if they can remind you what a collage is. Demonstrate how to hold scissors and cut. Remind students they can outline their observations in pencil before cutting out. Show class Miro images again. Demonstrate making a collage, appropriate use of glue, working in groups. Students may choose to see this as a chance to continue building up their sculptures in 2-D or explore. Show how collage pieces can be moved around before gluing down to test. Show how different colored paper can create contrast, make more visible.
Art Making - (45 minutes)
Students should all have glued at least one collage by the end of the class.

Reflection – (15 minutes)
Ask students to share their work and what shapes they observed. Ask if they can see or match the drawings or shapes to the sculptures. Inquire about questions for the artist(s) and if they had their own object in mind or were looking only at the sculptures.
P.S. 171
P.S. 171
2nd Grade Woodblock Sculptures and Watercolors


Kindergarten Collage


P.S. 124
4th Grade Limner Self-Portraits

4th Grade Pattern Prints
P.S.124 Art classes created pattern
prints and accordion books. Students had learned about the industrial
revolution with their homeroom teacher Ms. Welch. In art we talked about
mass production and looked at samples of patterns used on plates,
fabrics and wallpapers. Students traded prints with one another to add
to their motif samples accordion books.

